Launch your first instance
This walk-through starts an Ubuntu instance in Karachi that you can log in to over SSH, then removes it again. It takes about ten minutes. Each step shows the console and the same request with the API; follow either.
Before you start
- A role of project admin or project member on a project, here
web-shop, in Karachi. See Create a project. - An SSH key pair on your computer. No key yet? Run
ssh-keygen -t ed25519. - For the API tabs: a service account's API key and the variables set as in API: Before you start.
1. Add your SSH key
-
Print your public key on your computer:
-
In the console, choose
web-shopin the scope selector. Under Compute, choose SSH keys, then Add SSH key. - Paste the whole line into Public key. Never paste the private key: the console refuses it.
- Leave Who can use it on Only me and choose Add SSH key.
curl -sS -X POST "$NUBESTACK_API/v1/orgs/$ORG/ssh-keys" \
  -H "Authorization: Bearer $NUBESTACK_API_KEY" \
  -H "Idempotency-Key: $(uuidgen)" \
  -H "Content-Type: application/json" \
  -d "{\"display_name\": \"my-laptop\", \"public_key\": \"$(cat ~/.ssh/id_ed25519.pub)\"}"
The answer is 201 Created with the key and its id (ssh_…). Adding a key takes effect at
once; there is no operation to follow.
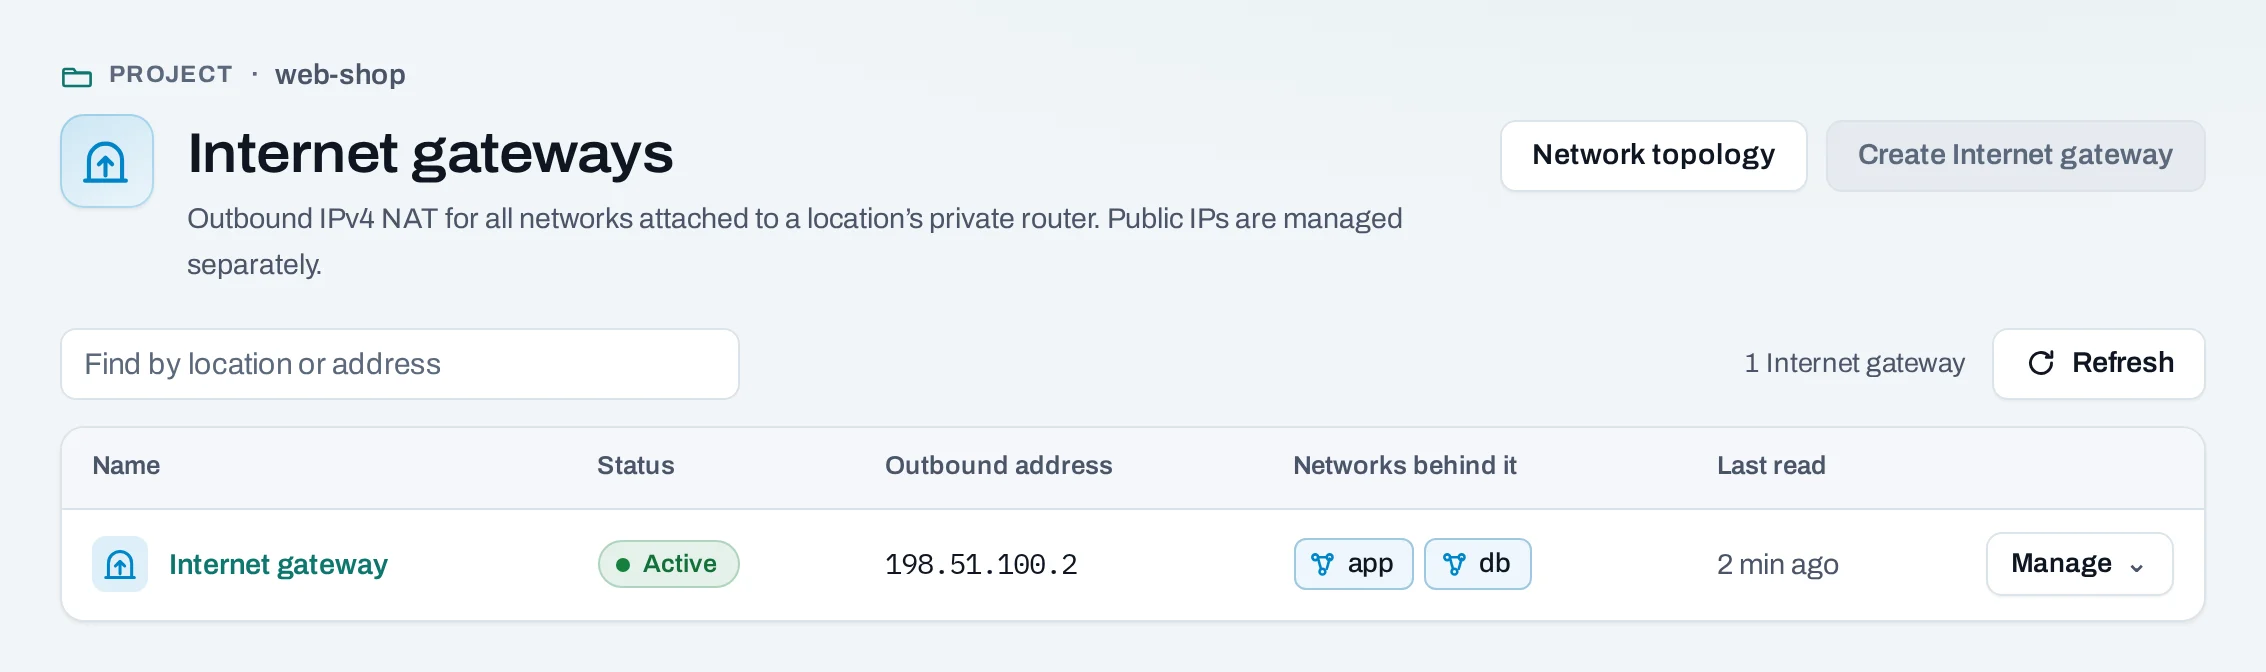
2. Check the network and the Internet gateway
A public IP needs a network that reaches the project's router and an Internet gateway in the location. A project made with Set up a network and Create an Internet gateway has both.
- Under Networking, choose Networks. The network
default(10.0.0.0/24) was made with the project. No network? Create one. - Under Networking, choose Internet gateways. If the list is empty, choose Create Internet gateway and confirm. It is ready when its outbound address shows.
Find the network's ID:
curl -sS "$NUBESTACK_API/v1/orgs/$ORG/projects/$PROJECT/networks?location=pak-khi-1" \
  -H "Authorization: Bearer $NUBESTACK_API_KEY"
Add a gateway if the project has none. $PLACEMENT is the project's ID in its location:
placements[0].id in GET /v1/orgs/$ORG/projects/$PROJECT.
curl -sS -X POST "$NUBESTACK_API/v1/orgs/$ORG/projects/$PROJECT/placements/$PLACEMENT/internet-gateway" \
  -H "Authorization: Bearer $NUBESTACK_API_KEY" \
  -H "Idempotency-Key: $(uuidgen)" \
  -H "Content-Type: application/json" \
  -d '{}'
The answer is 202 Accepted with an operation to follow.
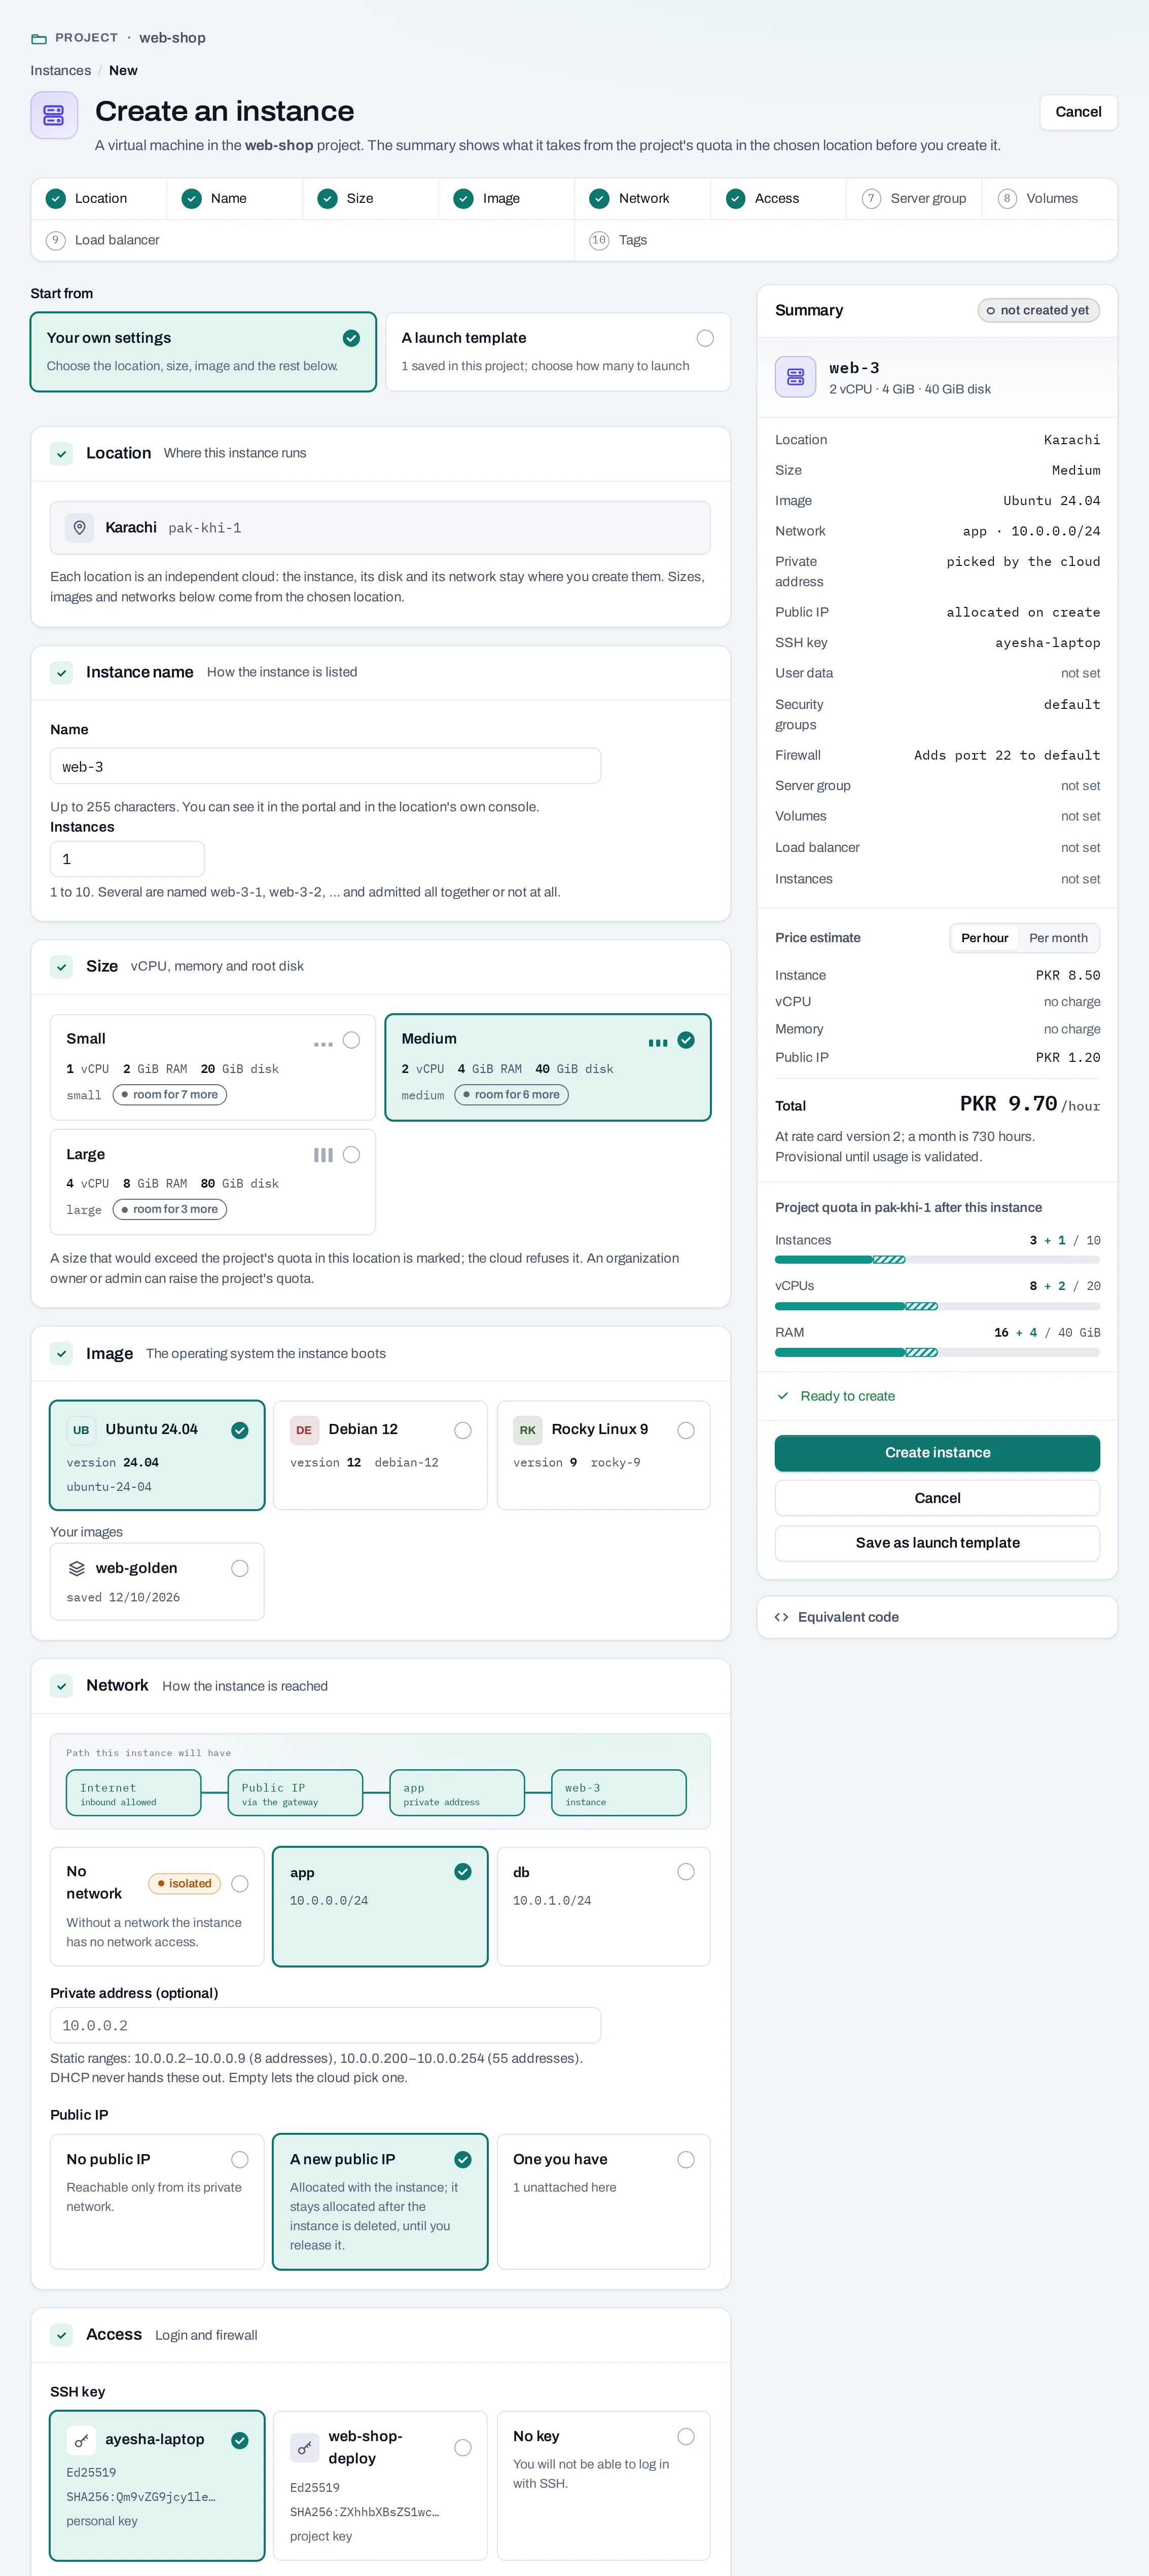
3. Create the instance
- Under Compute, choose Instances, then Create instance.
- Location shows the project's location, Karachi.
- Name:
web-1. - Size: a small size is enough; you can resize later.
- Image: an Ubuntu image.
- Network:
default. Under Public IP, choose A new public IP. - Access: choose your SSH key and turn on Allow SSH (port 22) from anywhere.
- Check the summary on the right, then choose Create instance. Owners, admins and the billing role also see the price estimate there.
Sizes and images come from the location's catalog:
GET /v1/orgs/$ORG/catalog?location=$KHI. Use their slugs. location is the project's
location, loc_… from GET /v1/orgs/$ORG/locations.
curl -sS -X POST "$NUBESTACK_API/v1/orgs/$ORG/projects/$PROJECT/servers" \
  -H "Authorization: Bearer $NUBESTACK_API_KEY" \
  -H "Idempotency-Key: $(uuidgen)" \
  -H "Content-Type: application/json" \
  -d '{
    "location": "loc_01jbkhi",
    "display_name": "web-1",
    "offering": "small",
    "image": "ubuntu-24-04",
    "network_id": "net_01jbdefault",
    "ssh_key_id": "ssh_01jbayesha",
    "public_ip": true,
    "security_group_templates": ["ssh"]
  }'
security_group_templates: ["ssh"] opens TCP 22 from anywhere, like the console's switch.
The answer is 202 Accepted:
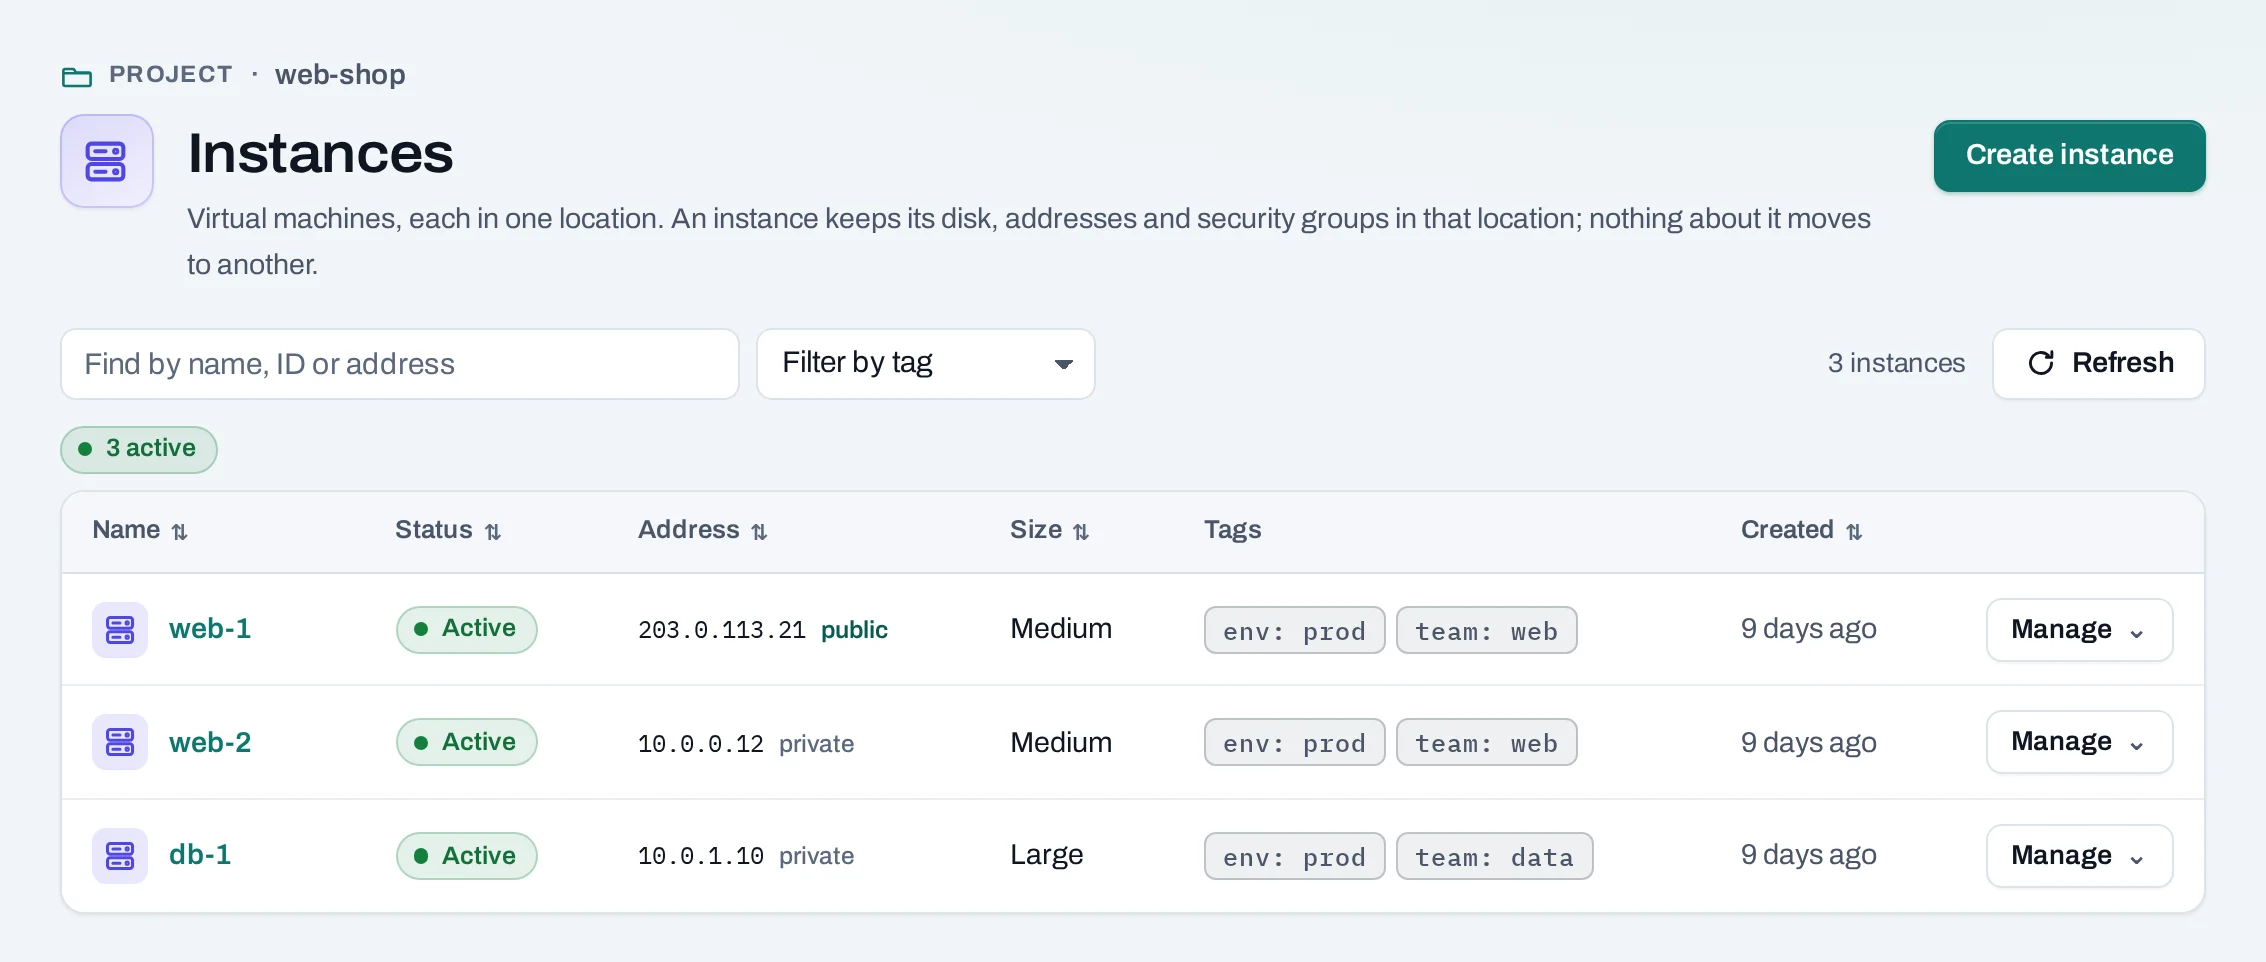
4. Wait until it is active
The page shows Instance requested. Choose Follow the operation to watch each step, or wait for the instance to read Active in the list, usually within a minute or two. The list shows the public IP beside it, marked public.
5. Log in
Log in as the image's default user, ubuntu on Ubuntu images, at the public IP:
Refused or timing out?
Check, in this order: the instance is Active; it has a public IP; one of its security groups allows TCP 22 from your address; the location has an Internet gateway. The instance's Console log tab shows whether it booted. See Troubleshooting.
Once you are in, narrow SSH to your own addresses: add a rule for your office range to the
security group, then remove the rule open to 0.0.0.0/0.
6. Clean up
Delete what you made so it stops counting in your usage.
- Instances: choose Manage → Delete on
web-1and confirm. Its system disk goes with it. - Public IPs: the address stays allocated to the project after the instance is gone. Choose Manage → Release on it and confirm.
- Optional: an Internet gateway counts as gateway hours while it exists. If you made it only for this, delete it under Internet gateways.
curl -sS -X DELETE "$NUBESTACK_API/v1/orgs/$ORG/projects/$PROJECT/servers/srv_01jbweb1" \
  -H "Authorization: Bearer $NUBESTACK_API_KEY" \
  -H "Idempotency-Key: $(uuidgen)"

curl -sS -X DELETE "$NUBESTACK_API/v1/orgs/$ORG/projects/$PROJECT/floating-ips/fip_01jbweb1" \
  -H "Authorization: Bearer $NUBESTACK_API_KEY" \
  -H "Idempotency-Key: $(uuidgen)"
Each answers 202 Accepted. Follow the instance's operation to succeeded before you
release its address.
Next
- Publish a web application with cloud-init.
- Add a volume for data that outlives the instance.
- Invite your colleagues.