Create a project
A project holds your instances, networks and volumes, and the people who may use them. It runs in one location, chosen when you create it, and has its own quota there.
Skip this page if you already have a role on a project: choose it in the scope selector at the top of the console.
Before you start
- You need to be an owner or admin of the organization. Members can create projects too when the organization allows it (Settings → General → Members may create projects).
- Decide where the project runs: Karachi (
pak-khi-1) or Islamabad (pak-isb-1). The location never changes. To run in both, create a project in each. See Locations.
Create the project
-
Open the scope selector at the top and choose New project here under Karachi (or Islamabad). You can also start from the organization's Settings → Projects → New project.
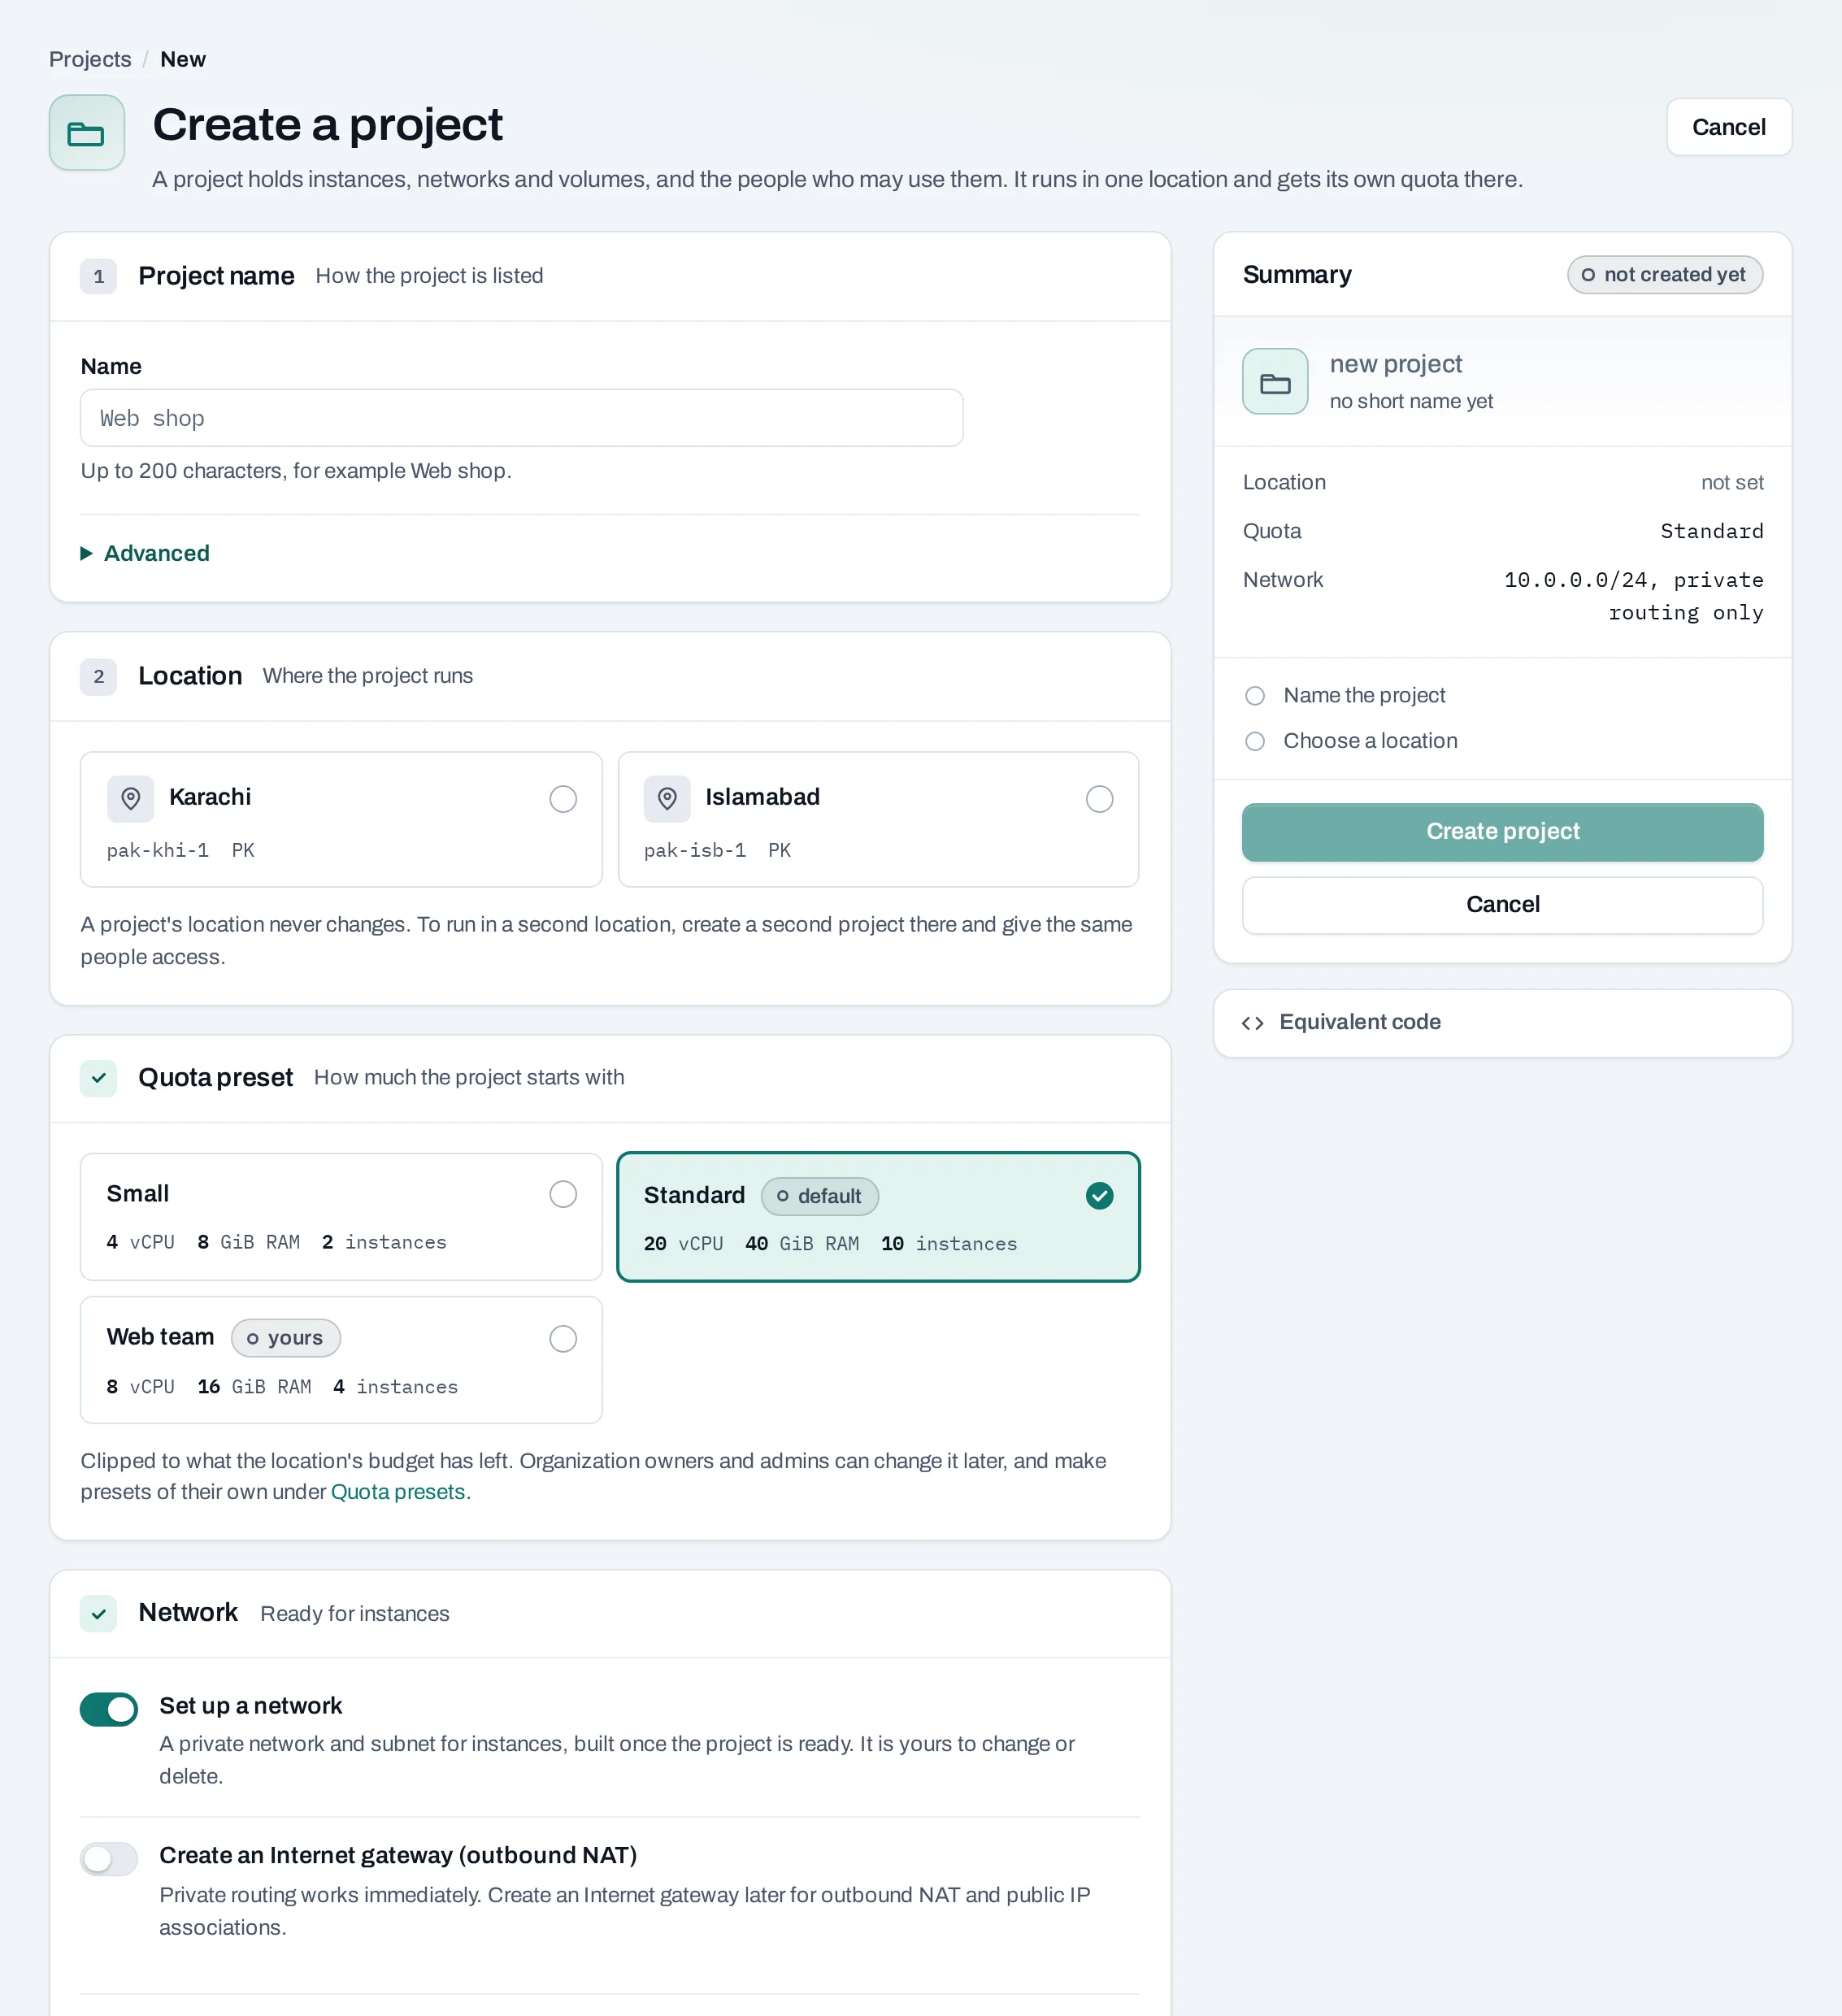
The new project page: name, location, quota preset and network, with a summary on the right -
Project name: how the project is listed, up to 200 characters, for example
web-shop. Under Advanced, the Short name is filled in from the name: lower-case letters, digits and dashes, at most 51 characters, unique in the organization. It appears in addresses and in the location's own tools. Neither name can change later. - Location: where the project runs. The one you chose in the scope selector is picked already.
- Quota preset: how much the project starts with. Keep the default unless an owner or admin told you otherwise. See Quota.
- Network: leave Set up a network on. A private network named
default, with the range10.0.0.0/24, is built once the project is ready. To use another private range, open Advanced and change Address range; do so if you will connect this network to another that already uses10.0.0.0/24. - Create an Internet gateway (outbound NAT): turn it on if your instances should reach the Internet or have public IPs. You can add one later.
- Check the summary on the right and choose Create project.
The project opens. It is ready within a few minutes; until then its location shows setting up. You become the project's project admin.
Projects are made in the console or the CLI
A service account's API key cannot create or delete projects. People create them in the console, or with the NubeStack CLI signed in as themselves. Everything inside a project can be automated; see API.
Give others access
In the project, open IAM → People and choose Give access to give someone a project role. See Projects.
Next
- Launch your first instance.
- Projects and quotas: how quota is shared out.